October 10, 2026
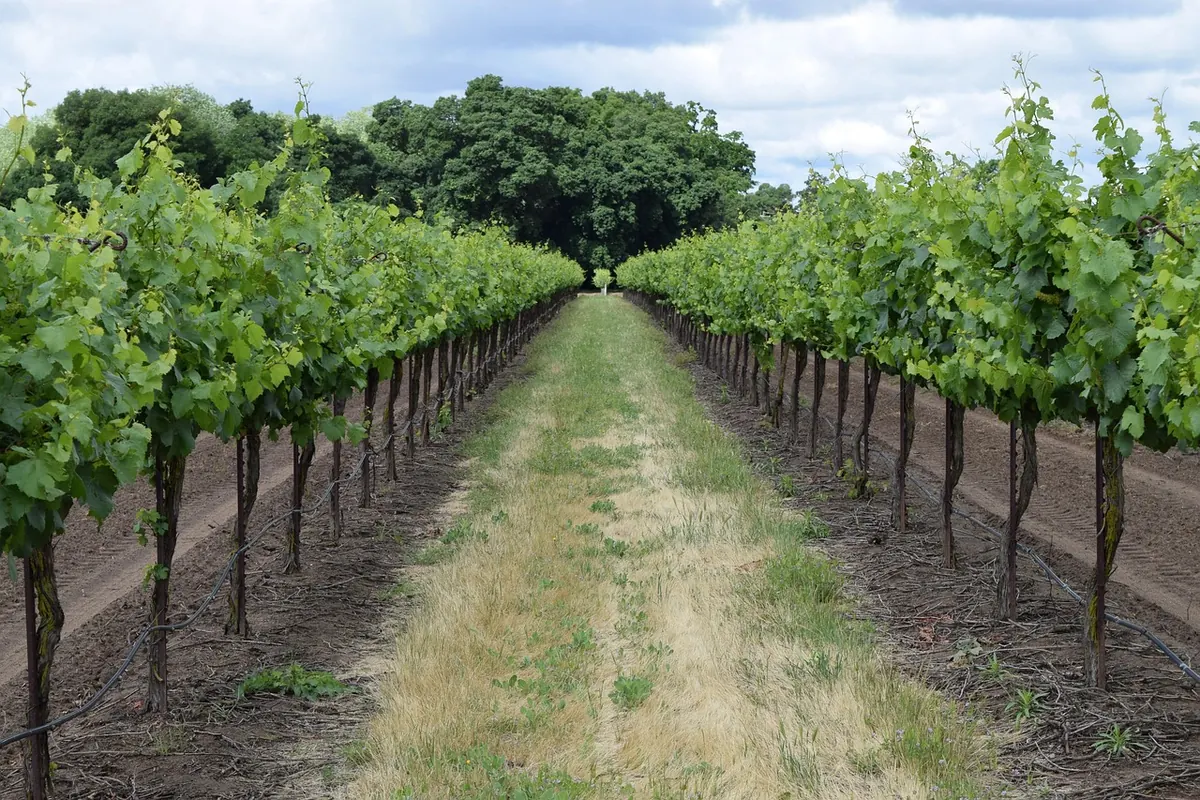
By midsummer a grape vine can look less like a well-behaved climber and more like a green avalanche. Shoots are racing along the wires, laterals are sprouting from every leaf joint, and the bunches have disappeared into the crowd. Summer pruning is how you take charge again — not by cutting the vine back hard, but by guiding its growth. Done at the right moments, it opens the canopy, exposes fruit to light and gives you a far better chance of ripe, healthy grapes in autumn.
Why summer pruning earns its keep
Winter pruning sets the framework. Summer work manages everything that grows out of it. A vine produces far more shoot and leaf than it needs to ripen its crop, and crowded growth is where trouble starts: still, damp air around the bunches, shade that slows sugar accumulation, and the perfect conditions for botrytis and downy mildew.
Summer pruning does three jobs at once. It opens the canopy to light and wind, it steers the vine's energy towards fruit rather than endless extension growth, and it makes netting, spraying and picking much easier. Hold on to one principle: you are thinning the canopy, not stripping the vine. Leaves are the vine's engine, and a rough guide is a dozen or so healthy, well-lit leaves for every bunch you intend to harvest.
Start with shoot positioning
Positioning comes before cutting, and it does most of the work. Shoots should be spread evenly along the wires rather than bunched into a thick hedge that shades its own fruit.
- Work along the row and lift any shoot that has grown past its wire, tucking it between the catch wires above.
- Bend shoots gently. A sharp fold will kink the stem, and that shoot is finished for the season.
- Aim for roughly a hand's width between shoots where the vine allows it. Even spacing beats a dense wall every time.
- Snap off water shoots sprouting from the trunk and anything growing straight up through the middle of the canopy while it is still soft enough to break by hand.
Laterals — the short side shoots that appear from the leaf joints of the main summer shoots — should be stopped at one or two leaves. This keeps the canopy thin without taking away the leaf area closest to the fruit.
Topping and hedging
Once shoots are standing a good hand's span above the top wire and starting to flop, tip or hedge them. On a vertical shoot position system this is usually done with shears in a single pass, but leave enough leaf above the top bunch to keep ripening going. Resist the urge to scalp the row down to the fruit zone. On a pergola or arch, the same idea applies: keep the growth tidy and airy rather than tamed to the bone.
Leaf removal: the bunch zone is what matters
Leaf pulling is not defoliation. You are opening a window, not demolishing the wall. Concentrate on the leaves and laterals sitting directly in front of and around the bunches, from the fruit up towards the top wire.
In cool, damp climates, clearing the morning-sun side is usually enough to dry the fruit early in the day. In hotter, sunnier situations, leave more cover on the west and south-facing sides, because exposed berries can blister and burn. Remove yellowing, damaged or mildewed leaves first — they are doing nothing useful and may be spreading spores.
There are two natural moments for this. A light tidy shortly after fruit set improves airflow through the stage when bunches are most vulnerable. The main pass comes after veraison, as the grapes colour up and sugar begins to build. Work with dry foliage, and drop everything you remove into a bucket rather than onto the soil.
Thinning the crop
Most vines set more fruit than they can ripen properly. Thinning is the difference between a heavy crop of thin, late grapes and a modest crop you are proud to eat. Wait until after fruit set, when berries are around pea-sized and before the bunches close up tight.
- Cut out undersized, misshapen or late bunches first.
- On most varieties, leave one bunch per shoot and remove the second and third.
- Take out bunches sitting deep in shade or hanging close to the ground.
- Remove any second crop — laterals that flower late and will never ripen.
- Open up compact bunches by snipping out damaged or rotting berries with fine scissors.
Cut the stalk cleanly just above the bunch and move on. Once the crop is set to the level you want, leave it alone; constant fiddling damages berries and lets disease in.
A season of small jobs
Summer pruning works best as a series of light passes rather than one dramatic session. A simple rhythm looks like this:
- Early summer: tie in and space shoots, remove trunk growth.
- Just after set: stop laterals, tidy the fruit zone lightly.
- Mid to late summer: hedge the tops, thin the crop.
- Around veraison: main leaf removal, check bunches for problems.
- Before harvest: a final tidy so pickers can see what they are doing.
Mistakes that undo the work
Tipping shoots hard before flowering can knock back fruit set, so keep early work gentle. Over-defoliating in hot weather causes sunburn; under-thinning leaves you with a pile of unripe fruit. Avoid cutting into older wood in summer, because wounds heal slowly and the vine may bleed. Never work among wet foliage, since that is how spores travel from plant to plant, and always clear your clippings away rather than leaving them under the vine.
The ten-minute weekly routine
From midsummer onwards, walk the row once a week with secateurs in one hand and a bucket in the other. Tuck the shoots that have wandered, pinch laterals back to two leaves, pull the handful of leaves shading a bunch, and drop any damaged berries. Ten minutes a row is usually plenty, and it keeps the canopy open enough that you rarely need to make a big, stressful intervention later.
If you can stand at the end of the row and see dappled light through the vine, with bunches catching the morning sun and air moving freely around them, you have got it about right. That is summer pruning done well — quiet, regular and always in service of the fruit.
Photo: Engin_Akyurt / Pixabay